Many community members agree that WordPress 5.x performs the best on managed WordPress hosting because of high-performance and improved support for WordPress based projects.

By now, you must have heard of the Gutenberg WordPress Editor that has raised all sorts of discussions about the impact of a new editor on the content creation and publication cycle.
With WordPress 5.0 onwards, Gutenberg has ousted most of the visual editors. When I talk about editing tools, there are often conflicting opinions (both from the aesthetic point of view and coding) about which is the best to use:
If this is the first time you hear about Gutenberg for WordPress or if you have just started using it, this post will help you understand how to use the new editor to customize the layout of your content.
Let’s read on!
What is Gutenberg Editor?
Gutenberg is the replacement for the Classic WordPress Editor (the WYSIWYG text editor with which you write your posts and pages). It’s not just an aesthetic update though. It has completely changed the editing experience by moving to a “block-based approach” for the content.
While users’ focus is only on content creation, Gutenberg’s ultimate goal is to move towards the creation of almost real time page-templates. This means that you will be able to build an entire site using Gutenberg, including landing pages and other important content.
Gutenberg vs. Classic Editor
For a quick view, here’s how the Classic WordPress Editor looks:

And here’s how things look in the new Gutenberg WordPress Editor:
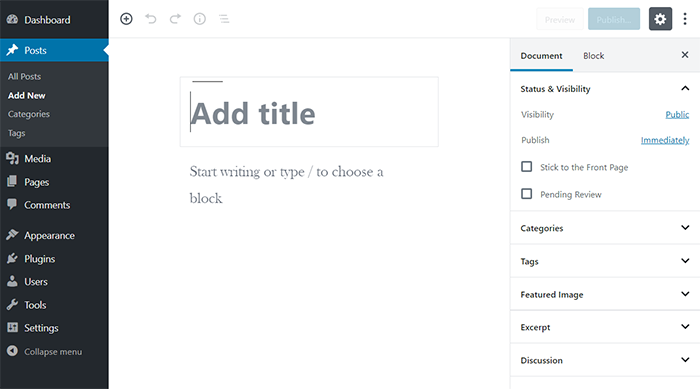
Gutenberg has completely changed the experience of editing a page, switching to a block-based approach to content (more exactly what blocks there are in a second). Similar to those of visual editors.
Create Page/Post with Gutenberg Editor
Before we start adding some blocks, let’s briefly discuss the elements of Gutenberg Editor’s main interface:

- Add new blocks
- Cancel/reset buttons
- Access to the document settings; allowing you to manage categories and tags, foreground images, etc. It is similar to the sidebar of the Classic WordPress Editor.
- Once you’ve added some blocks, that’s where you’ll actually work with the content of your post.
- Update or live preview of your page or post
- Access to the specific settings of that block
- More options such as Top Toolbar, Code Editor, Reusable Blocks, etc.
Add Blocks to Gutenberg
As discussed in the introduction, you will use different “blocks” to build layouts with Gutenberg. To add a new block, simply click on the “+” (Plus) icon and search the type of content you want to add.

In the example above, I showed how to add a basic text block. But Gutenberg actually includes a lot of different blocks, divided into different sections:

The Most Used tab helps you quickly access relevant blocks for your site. To access all the blocks, however, you will need to expand each tab.
On the Blocks tab, you have:
- Inline Elements: allows you to add inline images to your content.
- Common Blocks: contains basic elements such as images, paragraphs (normal text), headings, citations, etc.
- Formatting: allows you to add other formatted content such as pullquotes, tables, codes, custom HTML and more.
- Layout Elements: allow you to divide the text into two columns, including buttons, separators, page break.
- Widgets: allows you to add shortcodes, latest posts or categories. You can even view sidebar widgets directly in Gutenberg.
- Embeds: allow you to incorporate content from dozens of external sources including YouTube, Facebook, Twitter, Instagram, and more.
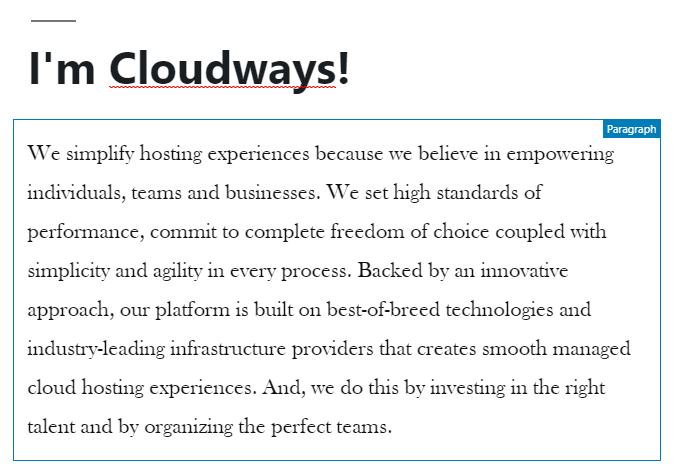
Build a Basic Layout
Let’s start with a simple thing! Suppose you want to create a layout for a basic blog post that includes:
- Main heading
- Plain text
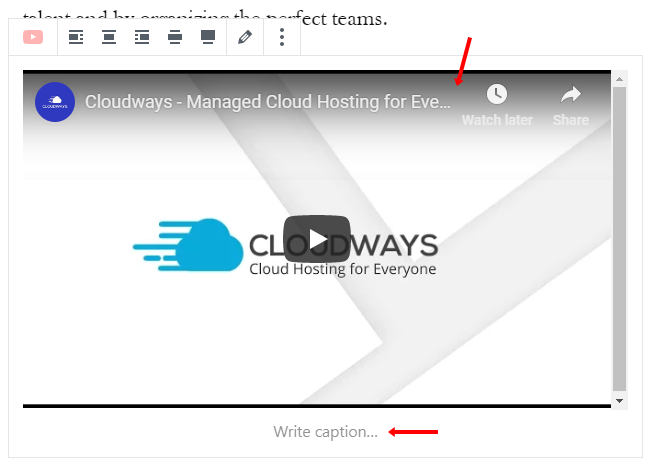
- A YouTube video embedded
Here’s how you would do it with Gutenberg Editor. Simply add your content in the blocks (see below).
Similarly, if you want to embed a YouTube video, add the YouTube block from the Embeds tab.

Once it is added, insert your YouTube URL and click on the Embed button.

The final result will look like this (see below).
That’s all for the basic layout. Now let’s create reusable blocks, which you can use in other posts or posts easily.
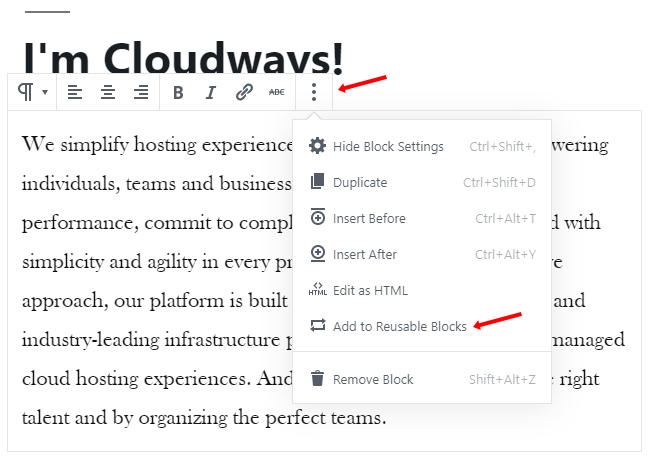
Add Reusable Blocks
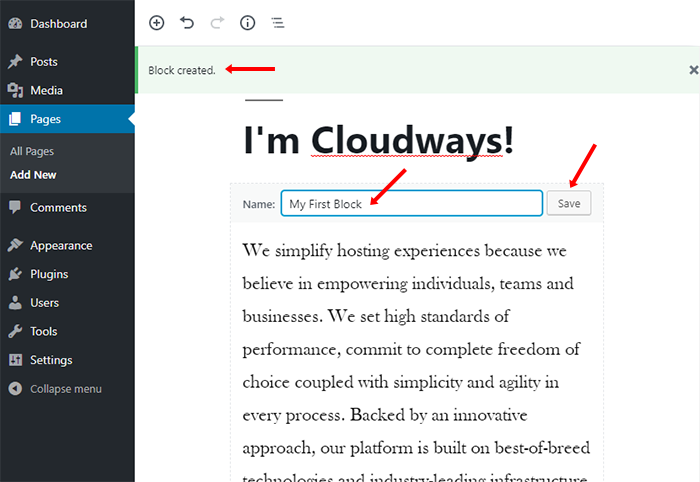
Move the mouse over to any block, click on the three points, and choose Add to Reusable Blocks.
In the next screen, you will notice that your reusable block has been created. Enter the name of your block and click on the Save button.
Import/Export Reusable Blocks
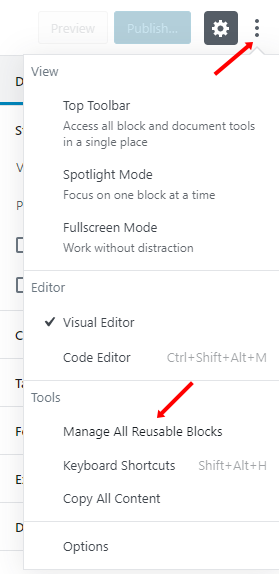
Click on the three vertical ellipsis (?), and then click on the Manage All Reusable Blocks option.
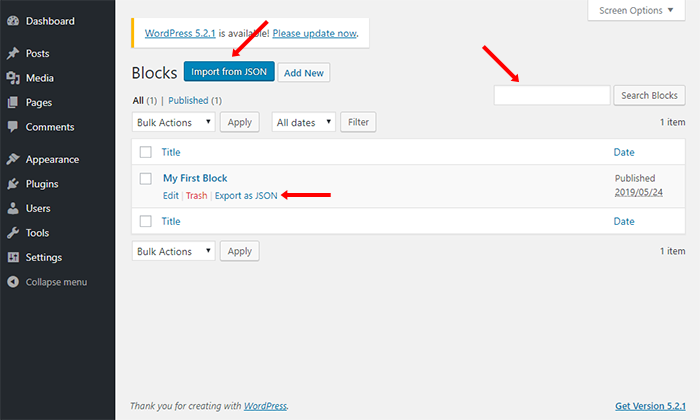
In the next screen, you will see all your saved Reusable Blocks. You can simply import, export, edit or remove them.
That’s all for using Gutenberg WordPress Editor!
Final Thoughts!
Overall, I was very impressed with the new Gutenberg WordPress Editor, it’s definitely something I have always wanted for a better user experience. But when it was announced two years back, it received mixed reviews from the WordPress Community: some embraced it and some rejected it. However, if you don’t want to use Gutenberg Editor, you can still disable it using Disable Gutenberg plugin.


