Photography is probably the hardest thing I’ve at any point realized, which is for what reason I’m here to offer you some basic photography tips for fledglings. Pointing a camera and squeezing a catch is simple enough. The troublesome part is getting a shot to coordinate your vision.
It assumed control over a year to create the principal photograph I really loved, and right up ’til the present time I despise 99 out of each 100 photographs I take. It’s an intense side interest to get and photography is an extreme profession to seek after. You can explore top magazines in the world where you can find about photography.
However, don’t give that a chance to discourage you from learning photography!
I immovably accept everybody ought to gain proficiency with some photography since it can make you more joyful. In case you’re a flat out fledgling, here are a bunch of photography tips I consider must-adapt first material for apprentices.
The Exposure Triangle
Photography is tied in with catching the light. Most amateurs think the enchantment of photography occurs in the camera body, however, the genuine wellspring of enchantment is light. A sufficiently bright subject can be caught inadequately, yet a dreary subject will never look great.
When snapping a picture, the camera opens its shade and begins letting in light through the viewpoint. This light hits the camera sensor, which is then prepared as a picture. Three components influence how the light is caught and what the last picture resembles:
- Gap: How huge the focal point opening is, estimated in f-stops (f/2, f/5, f/11, and so forth). The littler the number, the more extensive the opening. The more extensive the opening, the more light comes in. Gap size likewise influences the profundity of the field.
- Shade Speed: How long the screen is left open, estimated in short order (1/200 sec, 1/60 sec, 5 sec, and so forth). The slower the screen speed, the more light comes in. Shade speed additionally influences affectability to the movement (for example quicker screen velocities stop movement while more slow shade rates produce movement obscure).
- ISO: How delicate the sensor is to light, estimated in ISO units (100 ISO, 400 ISO, 6400 ISO, and so forth). A higher ISO enables you to take photographs in darker circumstances, however the exchange off is commotion (“grain”). That is the reason photographs were taken in obscurity frequently have those trademark spots.
Whole courses have been educated on the presentation triangle, so think about this just a short review. The takeaway is that you should ace every one of the three angles—gap, shade speed, ISO—so as to take photographs that match your vision.
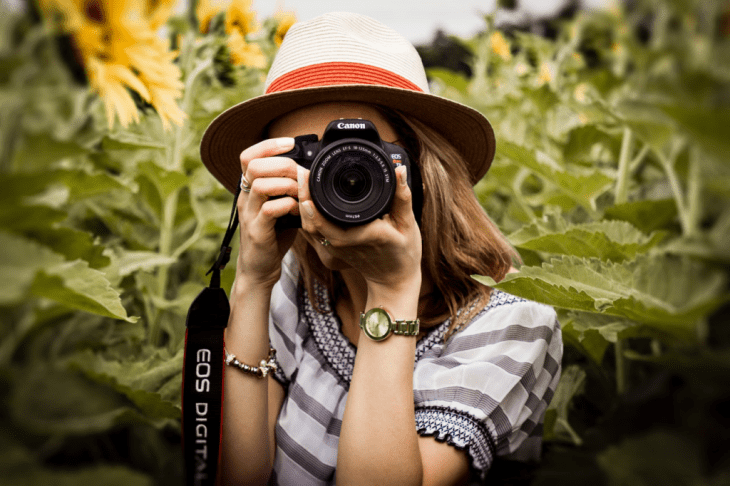
Step by step instructions to Hold a Camera Properly
The extremely next thing a photography tenderfoot must learn is the manner by which to hold a camera appropriately. When I state “appropriately,” I essentially signify “in a way that limits camera shake however much as could reasonably be expected.”
Keep in mind: When the camera is shooting a photograph, the screen goes up and the sensor tops off with light. In the event that you move while the shade is open, the light will spread over the sensor and result in a foggy photograph. No development rises to no camera shake.
While the video above is explicitly for camera bodies (DSLRs, endzone camera system, mirrorless, point, and shoots), you can without much of a stretch adjust it to cell phones. The key is to bring your arms near your body so they’re steady against your center. This will limit camera shake and permit your hand-held photographs to stay as sharp as could be expected under the circumstances.
For low-light photography, long introduction shots, or any photography including zooming focal points, you’ll need to utilize a tripod. Nothing ensures a steady and hazy free gave like a quality tripod.
The Rule of Thirds
More often than not, you can get a feeling of whether a given photo was taken by a novice picture taker or somebody with increasingly photographic experience. The greatest giveaway is a piece. Beginners frequently don’t have a vibe for structure, and extraordinary arrangement is the spirit of an incredible photo.
The synthesis is the situation of each component in a photo.
It depicts how a photograph is “formed,” which suggests purposefulness. Somebody who pays no brain to the organization can just take great shots unintentionally. However, when you genuinely get structure, you’ll have the option to make incredible shots out of any subject, area, or situation.
Rationally isolate the shot into thirds utilizing two vertical lines and two flat lines, at that point place components of high visual enthusiasm at any of the four crossing points.
Each picture taker utilizes this strategy. Some utilization it as a support, others use it as a fallback strategy when other compositional systems fizzle for a given shot. Notwithstanding, the standard of thirds must be a piece of your weapons store. There aren’t numerous photography tips that will give a learner as much value for-their-money as this one.
Change Your Perspective
One approach to guarantee an unremarkable photograph is to snap a subject straight-on from eye level. Everybody knows this perspective as of how—we communicate with the world from this perspective each and every day. It’s customary, drained, exhausting.
However, the fix is simple: shoot from an alternate vantage!
This can mean a couple of things:
- Change your height (for example draw nearer to the ground)
- Change your edge (for example attempt straight up or slanted from the side)
- Change your separation (for example, draw nearer or go more distant away)
Attempt a blend of each of the three. You’ll be astounded by how extraordinary your shots feel with these changes. For instance, look at the accompanying two shots:
The camera changed the height (closer to the ground) and changed separation (closer to the subject). The primary photograph is the thing that we regularly observe as people. Uninteresting, would it say it isn’t? However, the subsequent photograph isn’t something we see each day, so it’s all the more convincing.
Post-Processing Is Essential
Post-handling is regularly thought of as “drastically changing the source photograph utilizing high-sway channels or impacts.” This misconception has driven a few picture takers to promise to NEVER modify photographs, rather than confining themselves to “normal” photographs as it were. While their aims are honorable, they’ve misjudged how cameras work.
Each camera performs post-handling in any case. The genuine sensor information is caught in a RAW record, however, what you see on your camera’s LCD screen (or your cell phone) is your camera’s elucidation of that RAW information—and your camera has no clue about your innovative vision. Wouldn’t you rather do it without anyone else’s help?
What’s more, not all post-handling needs to look Photoshopped. Consider it like restorative cosmetics:
Some unwittingly go over the edge with becoming flushed and lipstick
Some go intense with their cosmetics as a type of self-articulation
Some utilization of cosmetics to quietly supplement their best highlights
Similarly, post-handling can be awkward and overcompensated, or it very well may be purposefully elaborate, or it tends to be unobtrusive and just used to improves what’s as of now there.
You have to post-process your pictures! Try not to neglect this significant aptitude. On the off chance that you do, you’ll, in the long run, arrive at a point where every one of your shots feels like they’re missing something—and that something will be a touch of post-handling love. For novices, we suggest the accompanying photograph altering applications:
Shoot Everything, Shoot Often
Practice gains ground. There’s definitely no chance to get around this. I couldn’t care less what number of YouTube recordings you watch, what number of photography articles you read, or what number of Instagram photographs you examine—in the event that you aren’t shooting, you aren’t improving.
An ounce of experience merits a pound of hypothesis. Get out there and shoot!
Your first photographs are going to suck. You may need to shoot thousands preceding you get one that you like. Yet, everyone, regardless of how terrible, is one stage towards being a superior picture taker. Practice doesn’t simply enable you to apply the hypothesis you adapt yet in addition get you acquainted with your gear and how various settings influence the last picture.
In the event that you incline toward guided practice to freestyle experimentation, we suggest looking at these aptitude building photography practices just as these imaginative photography thoughts for fledglings.
Try not to Blame Your Gear
While rigging does make a difference for photography, it doesn’t make a difference as much as you might suspect.
A gifted picture taker can deliver extraordinary photographs with a horrible camera, and an untalented picture taker will continue shooting duds even with the top of the line, costly gear.
It comes down to what we talked about above: light, presentation, piece, points, viewpoint, and post-preparing. In the event that you can ace those things, you’ll have the option to take extraordinary shots with anything—even cell phone.
Clearly, there are breaking points to your gear, and it’s conceivable to exceed a camera body, focal point, Speedlight, or embellishment. Be that as it may, the takeaway is that redesigning your rigging won’t overhaul your photography abilities. The sooner you acknowledge this, the quicker you’ll improve and advance.
Before you get a DSLR, attempt your abilities with your cell phone or a simple to use a camera. At that point, you can move up to an extraordinary camera for tenderfoots.